Complex Editis
Some scenes and shots in the film took more editing than others to achieve the vision that I wanted. Here are some examples of those edits:
Dramatic Shake:
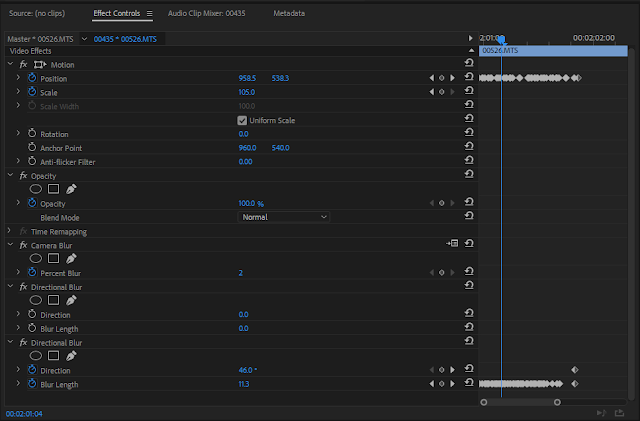
There are three main instances of the camera shaking dramatically to show action/ frustration in our film. One is at the gaming scene, the second is at the bank/ house scene and the third is at the first time travel scene.
I did this by adding the motion blur effect and just moving the position of the frame in Premier rather than doing it manually as the effect is much easier to do in post and looks more like what I wanted to achieve. When adding both the movement and motion blur, the effect looks like hyper real dramatic movement that I think is emphasised well by the characters expression and the loud sounds in those shots. By spacing each effect apart every other frame and changing the amount of blur/ movement on each frame, it stops the effect from looking static.
Time Travel Through Space:
I wanted the first time travel sequence to feel different from the rest in the film. It was probably the trickiest but also the most fun part of editing the film.
There were many different effects that were used to get the look of the character travelling through space. The first was stabilizing the footage of the character in being pushed backwards on the skateboard. I originally planned this shot for the character just moving backwards in the real world but the background didn't match the previous scene so we decided that he should be travelling through space instead. Stabilizing the image using the Warp Stabilizer tool made it much easier to mask and key the character as he was no longer wobbling.
Of course, masking the whole image was the most tedious part, not really hard, but tedious. Each frame had to be correct meaning no big gaps that revealed a lot of the background could be left which took a while to do. I had to manually do this too which made it take much longer.
After that came keying out the background and making sure that none of that seeped through on to the character. I did this by selecting the background with the colour picker; then I used many other sub effects to try and make it so none would seep through, mainly by creating a kind of glow around the character rather than having rough edges as a way to get around that.
After this was done and the background was successfully removed, I added in a space background from YouTube, specifically free footage if a wormhole and just sped it up and added the motion blur to that too so that the same speed of the character was reflected in the speed of the background. Then, the necessary sound effects and music were added.
Blue Screen and Animation:
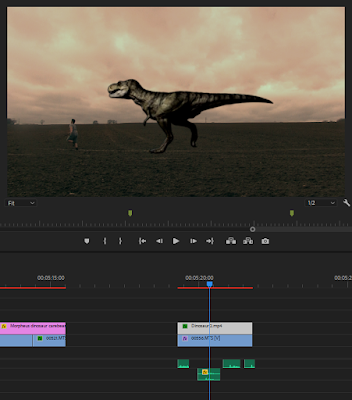
For the final end credits scene in our film, I wanted to add the main character running from a dinosaur. I knew off the bat that I wanted it to look bad and comical, originally planning to just add a toy dinosaur on screen but eventually settling with a free CGI dinosaur using green screen from YouTube.
This was actually pretty simple to get the whole scene the way I imagined it to be. First, I just used the ultra key to remove the blue background from the image, then added the same tints on to the dinosaur as were already on the footage of the character running. Then came animating the dinosaur properly. The video has the dinosaur running in place but because the camera pans on the shot, I had to animate it when necessary. This was nothing compared to the first time travel sequence for animating the mask so it did not take very long to do. Then, the sound effects were added and the scene was complete.


No comments:
Post a Comment